
The Waveshare ESP32-S3-Touch-LCD-2.8 is an ESP32-S3 based development board with a reasonable price (25-35$) and a solid list of features:
- Xtensa 32-bit LX7 dual-core processor (up to 240MHz)
- 2.4GHz Wi-Fi (802.11 b/g/n) & Bluetooth 5 (LE), with onboard antenna
- Built-in 512KB SRAM and 384KB ROM, with onboard 16MB Flash and 8MB PSRAM
- 2.8inch LCD display, 240×320 resolution, 262K color
- Capacitive touch function controlled via I2C interface, 5-point touch, with interrupt support
- Adapting UART, I2C and some IO interfaces, integrates full-speed USB port
- Onboard speaker, QMI8658 6-axis sensor, RTC sensor, TF card slot and battery recharge management module
- Board-Size: 70×50 mm
- Language Support: MicroPyton, C/C++
- LGVL-Support to build the UI
- Arduino IDE
- Official Waveshare site
- Official Waveshare wiki
The specs look pretty awesome so I decided to get a closer look on this little devil. My findings are documented on the following pages to share knowledge with interested people.
Here’s the plan:
- Setup development environment
- Run first Demo
- Setup own project
– Add LVGL-library - Tips & Tricks
1 Setup Development Environment
My machine is running Debian Linux (bookworm) so all instructions are Linux-based. The first important step is to get a local development-environment up and running.
Setup Debian Prerequisites
Some development-tools are needed which are available as debian-packages. So just open a terminal and type:
sudo apt-get install git wget flex bison gperf python3 python3-pip python3-venv cmake ninja-build ccache libffi-dev libssl-dev dfu-util libusb-1.0-0
Setup ESP-IDF
Next we have to get the software libraries provided by Espressif in ESP-IDF repository. In a terminal type:
mkdir -p ~/esp
cd esp
git clone --recursive https://github.com/espressif/esp-idf.git
Now you should see an “esp”-directory in your home-directory containing all needed software downloads.
Next we’ve to setup the downloaded software-packages:
cd ~/esp/esp-idf
./install.sh all
Now you will find a directory “.espressif” containing all needed software-components ready to use in your home-directory.
As a last step you’ve to add the Path to the “.espressif”-directory to your PATH-variable: by calling the provided script:
. $HOME/esp/esp-idf/export.sh
Setup IDE
There are two IDE-options: “Arduino IDE” or “Microsoft VS Studio Code + Espressif IDF plugin”. I’ll take the second choice because I’m using “VS Studio” for web-development already so I know it well.
To install “MS VS Studio” just follow this link. The installation should be straight forward, so I assume you get this working on your own.
Next we have to get the “Espressif IDF plugin” working in “VS Studio”. Open VSCode and close all open projects by “Menu > File > Close Folder” . Next create a new project by “Menu > File > Open Folder” named “esp32” (you can chose another name if you like to).
Next select the “Extension”-icon on the left side of the IDE-Window and insert “espressif” in the search field which will give you the following result:
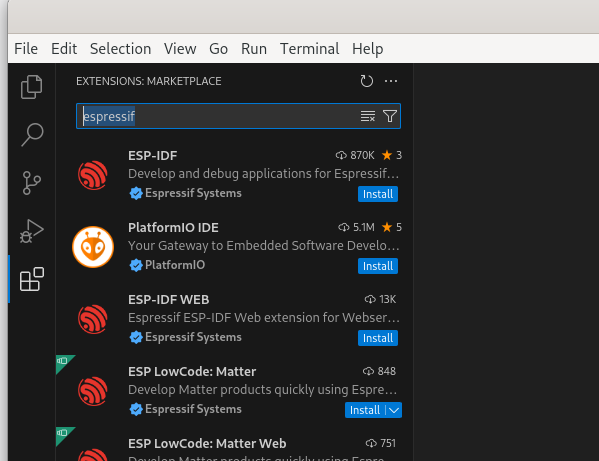 Just install “ESP-IDF” and check this link for configuration instructions.
This is how my configuration looks like:
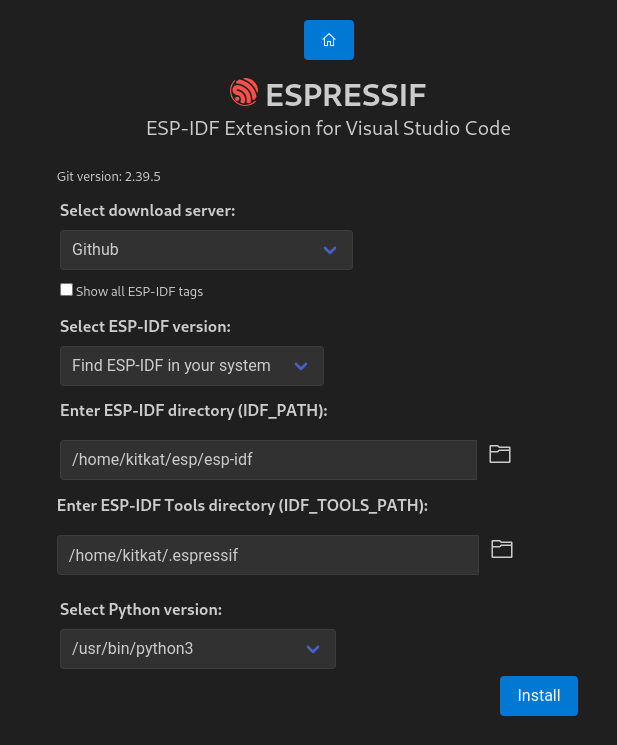 Click “Install” and you should be done.
Take care! I had the problem that “$HOME/esp/esp-idf” has been installed with wrong access.right (root/root) so I had to set the whole “esp-idf”-directory to my user/grp recursively.
2 Run first Demo
Just stick to the explanation here (see heading “Run the First ESP-IDF Demo”) to create your first “Hello World”-program. Maybe I’ll add my own description here if I see the demand.
3 Tips & Tricks
Serial Setup
I’ve connected the little ESP-Device by an USB-C cable to my linux-PC. By default you’re not allowed to access the device. You have to add your user to the “dialout”-group like this:
sudo usermod -a -G dialout $USER
Check if you’ve been added by:
cat /etc/group | grep dialout
should give you:
dialout:x:20:yourUser
Find your tty-interface
To access your device you’ve to find out the tty-interface to use. This can be done by this simple trick.
First do a “ls /dev/tty*” and you’ll get a list of known tty-devices.
Then connect the ESP-Device to your PC by the USB-C cable and do again “ls /dev/tty*”.
Just look at the difference in the output to find the tty-interface used by the comnnected ESB-Device!
Flash something manually
idf.py -p /dev/ttyACM0 flash
Set Environment-Variables after opening a new shell
. $HOME/esp/esp-idf/export.sh