Today just some abstract art ;)
Take care,
Andrew >:o)
Today just some abstract art ;)
Take care,
Andrew >:o)
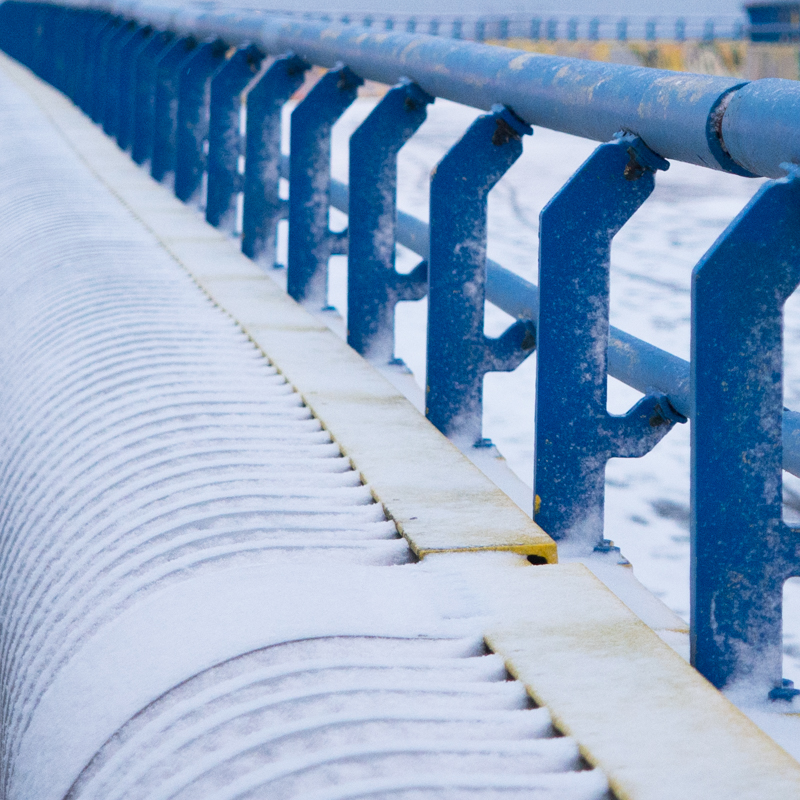
Temperatures dropped the last days and the first real snow this year has fallen today. Afterall winter finally arrived at vienna also :)
Cheers!
Andrew >:o)

The other day I passed by this nice neon sign definitely worth a picture.
Regards, Andrew >:o)

Long time no see! My last posting is months back … to be honest … after my Angaga diving-holidays I ran out of steam :|
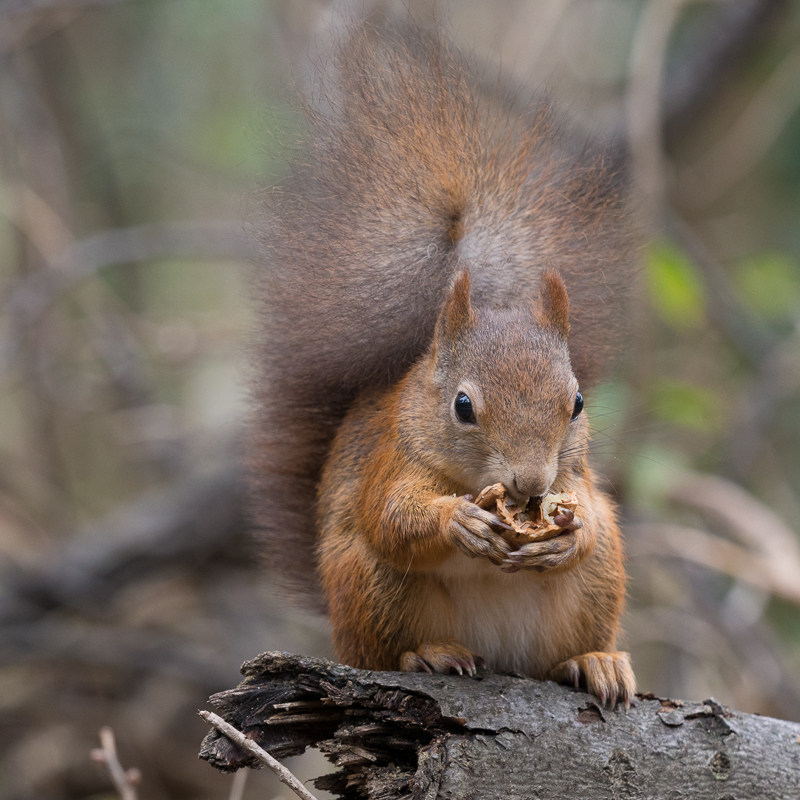
Back again with some impressions from todays visit at ‘Zoo-Schönbrunn’.
The ‘Olympus 40-150mm 1:2.8 PRO’ does a good job!
Enjoy it! Yours Andrew >:o)
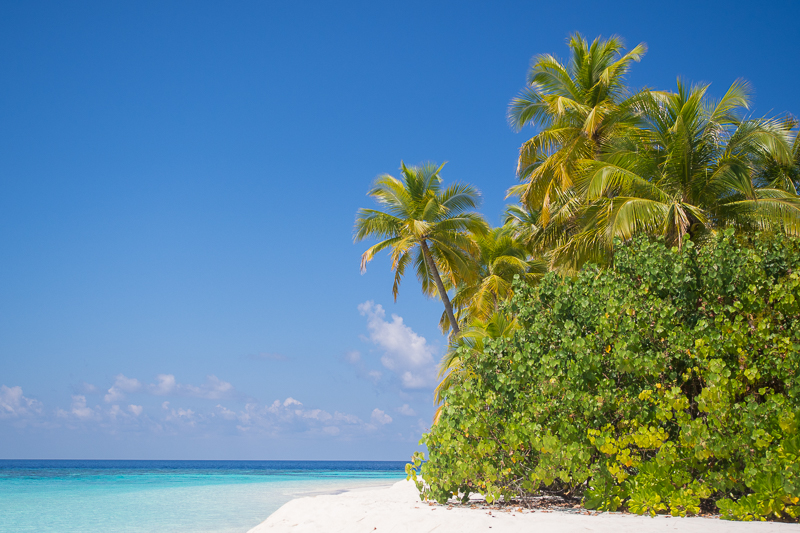
Today just some impressions from Angaga island. The colors you see on this shot are original – no Photoshop – I swear ;) This is what we see if we take 10 steps out of our apartment and turn right.
According diving … in the morning we went by boat to ‘Madivaru Manta Point’ which took us about 50 minutes. Maximum dive-depth was 16m with medium well sight of about 10m. Dive-time was 55 minutes with a water-temperature of about 29°C.
We meet two Mantas but they came not near enough to take a good picture with my 8mm fish-eye :( But we’ll be back again by the next 8 days, so let’s see if we can snap a great picture of this cool animals.
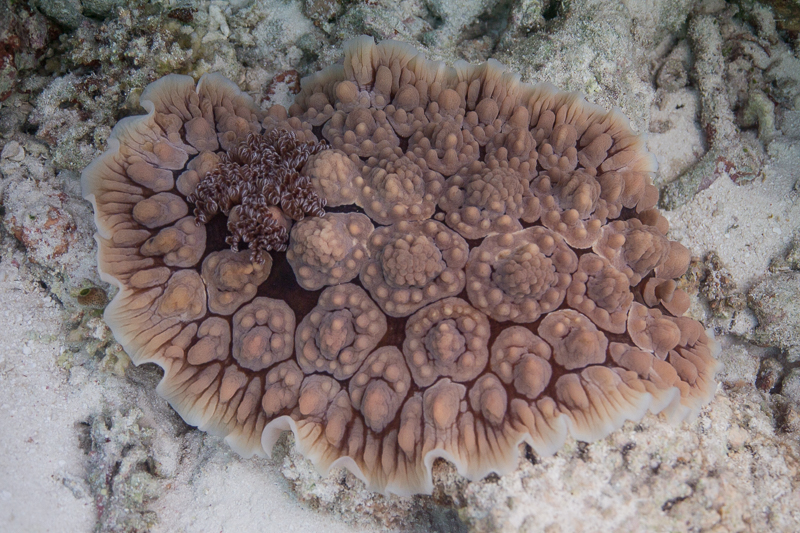
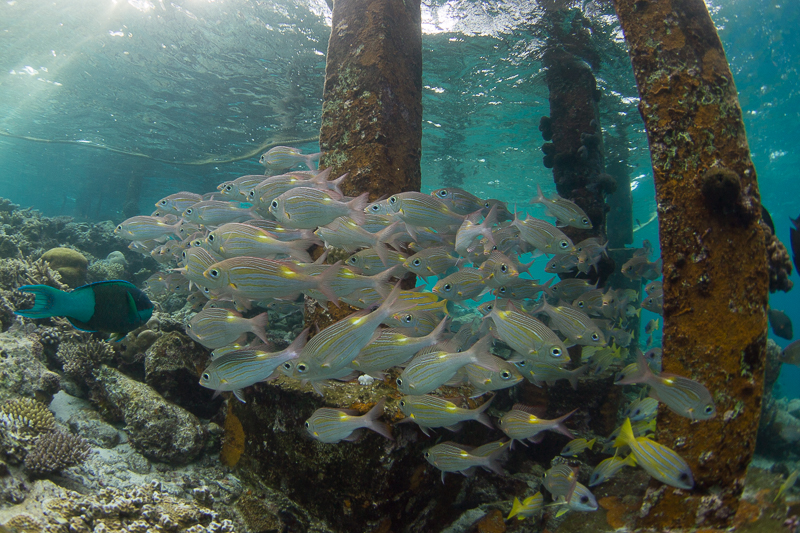
At the afternoon we had one dive at Angagas house-reef with some good foto-opportunities. The most interesting one is the following picture of ‘something’ which moved like a snail but had amazing dimensions of about 30cm x 20cm. I’ve never seen something like that before … but maybe one of our readers can give us a hint?
Cu tomorrow!
Andrew >:o)

Looks a little bit cheesy but I couldn’t stand to snap this picture. The only one of that kind for the next to weeks, I promise!
What happened today … hm .. not much. We checked in at the local dive-base, did some snorkeling and relaxing. The most impressive news for today is the rain-shower we had in the evening for an hour. Yes … it is raining in paradise also ;)
Last one impression of Angaga underwater using my new 8mm fisheye. Really crazy glas, a lot of distortion … but perfect view for big fish like Mantas and Walesharks. Cross your fingers and let’s hope that we meet one of this impressive giants by the next days!
So .. I’ll get a cocktail now .. cu and sleep well,
Andrew >:o)
We had so much fun @ Angaga last year so we decided to give this beautiful island a second try. And we’re happy to offer all our estimated readers of lensblues.com the opportunity to get some closer looks at this magic place with us. Be prepared to get daily impressions of Angaga over and under water for the next 14 days!
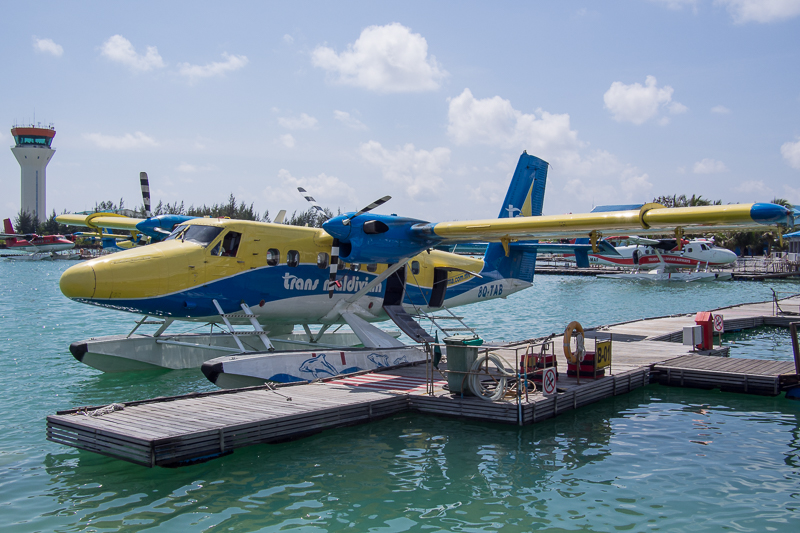
Every adventure at Maldives starts at Male. From there you’ve to go by speed-boat or a seaplane to your target resort. In our case we went by plane straight to Angaga which took about 35 minutes.
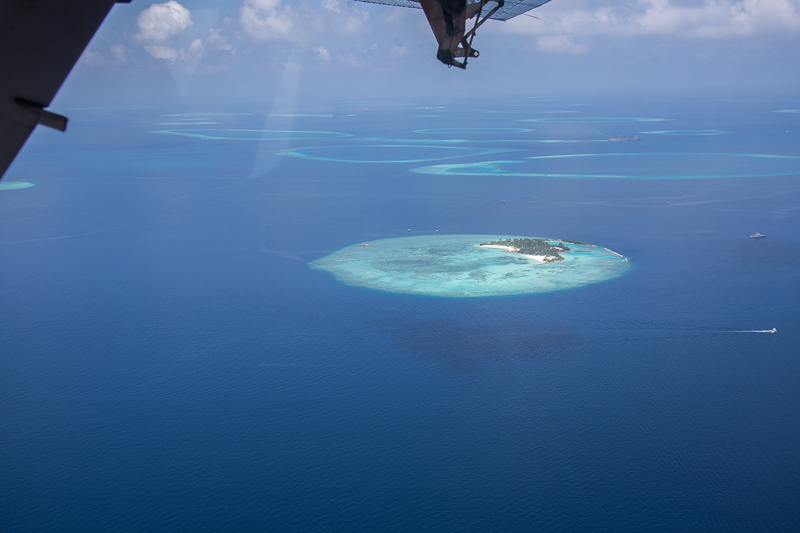
On the way we passed a lot of small islands and atolls, some occupied others just big enough host some vegetation.
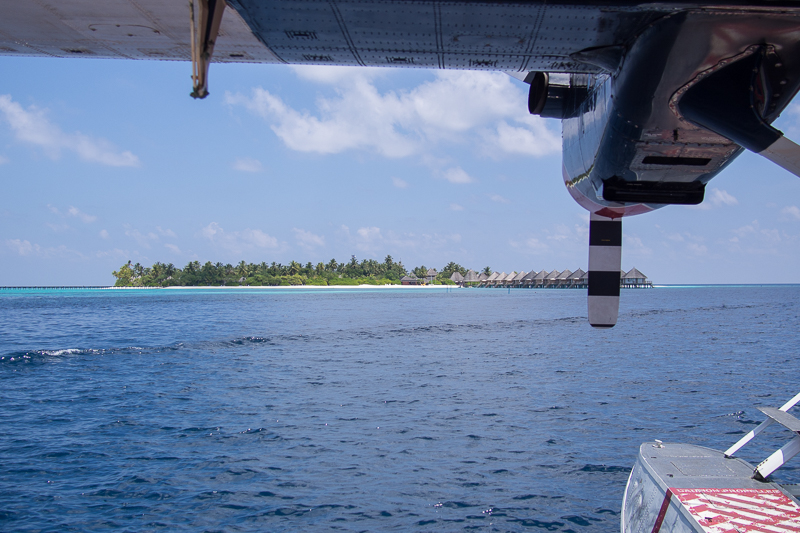
And finally we arrived at our spot – tired but happy :)
CU again tomorrow,
Yours Andrew >:o)
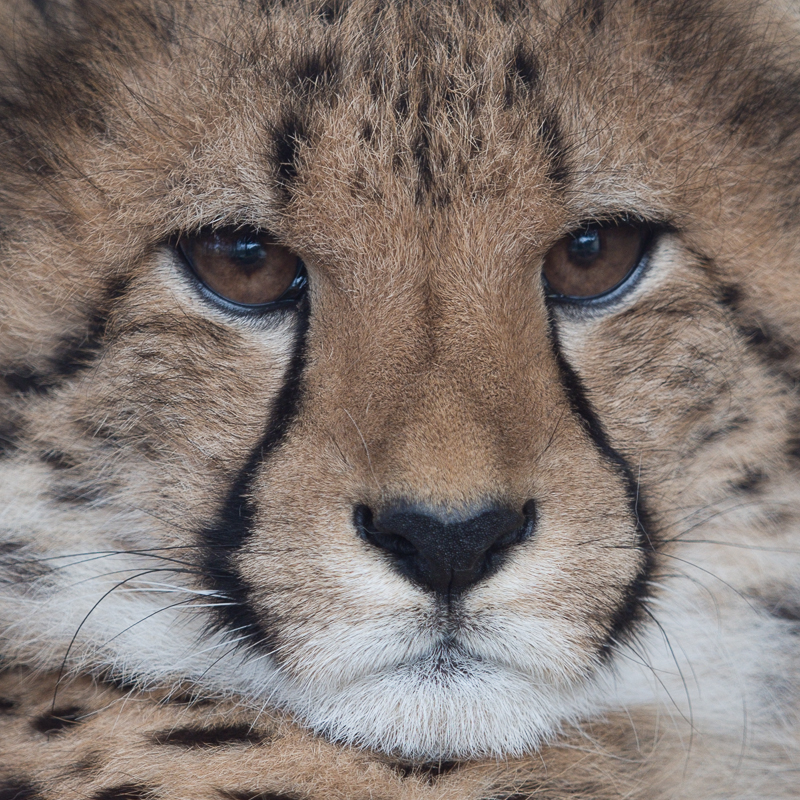
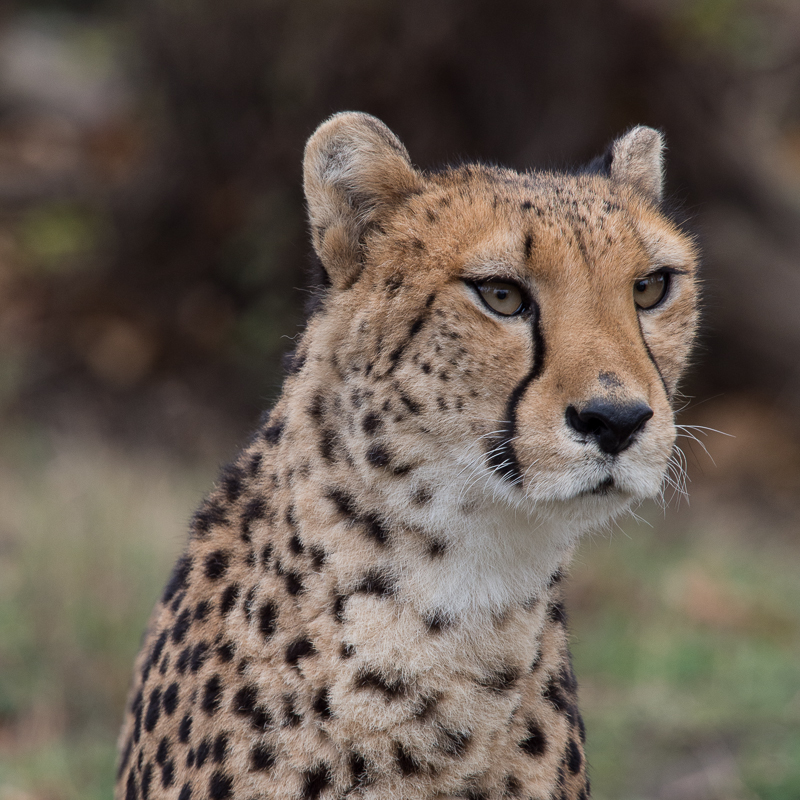
Some hundred pictures are shot now with the new ‘M.ZUIKO DIGITAL ED 40‑150mm 1:2.8 PRO lens’ and here are the two most important lessons I’ve learned so far:
So let’s start at point one: The Cheetah’s picture at the top has been taken at distance of about 2.5 meters at [ 260mm | f 2.8 | 1/250s | ISO 400 ] and as you can see, just the space between the right eye and the nose got perfect focus. The left eye is OK but is already out of focus. This is because you get a depth of field of about 30mm if you do the math. Of course everything is clear in photography if you think about it but it’s important to take care of it ;) I didn’t because till now I’ve used the Olympus 75-300mm / f4.8-6.7 at zoo which gave me double depth of field at the same settings because the minimum aperture is more than twice of my new lens. And so I got a nice depth of field automatically.
So for the future I’ve to get used to taking more care about depth of field. On the other hand it’s quite cool to be able now to isolate the subject and get a creamy bokeh much easier.
The second lesson I’ve learned is to take care about my ISO-settings! Im used to set my camera to AUTO-ISO, so in ‘Aperture Priority-Mode’ the camera takes care for sufficient exposure times by choosing the right ISO-speed. But the quality of this new lens is so high that sensor-noise starts bugging me at ISO 400. Correcting this noise by lightroom will wash out parts of the details one could get from this incredible lens.
So if you take into account that your OM-D E-M5/M1 owns a body-built-in picture-stabilizer which should give you up to 2 f-stops, it shouldn’t be a problem to decrease your ISO-settings for 1 or 2 stops. For todays picture this means an ISO of 200 would have been sufficient to get maximum details without any other disadvantage.
So my resume for future use: “For maximum quality keep an eye on ‘depth of field’ and stay away from AUTO-ISO setting.”
See you again soon,
Andrew >:o)